>

Sunday, November 28, 2010

Christmas Tree Decorations


This is one of 4 Christmas tree decorations made as part of a swap over on UK Stamper Forum.  We work in groups of five and I have made 4 of these to swap with the other members in the group......... and yes, they do look like the ribbon wreath shown a couple of posts back.  However these are much smaller being only around 2.5 inches in diameter.

My group of swappers all preferred traditional colours and I have used maroon, green, white, silver, gold and red ribbons along with some little red holly berries.  There is no stamping used on this one.


Again the base is made from green florists wire twisted into a circle.  The ribbons have been simply tied on to cover all of the wire whilst the holly berries have been twisted into place.  Finishing touch is to add a small length of silver twine to enable the decoration to be hung in place.

Hope they like them.

Sid xx

Pin It

Saturday, November 27, 2010

Christmas Mini-Book


Christmas is coming ever closer and this is a little chipboard book I have started to decorate.  So far I have only done the front and back covers.  Again I have gone ribbon crazy and used them to make the background for the front and back of the book.

The front was first covered with double sided tape in strips and the ribbons chosen from a selection from the Ribbon Girl.  I wanted a different colourway from the traditional Christmas colours and chose mainly oranges and turquoises in a variety of designs and textures.  These were simply adhered and trimmed in place with scissors.  I liked the frayed edges so I just went over the edge with spiced marmalade Distress Ink as seen.


The front was then decorated with a nesties die cut plate in coffee, edged with the same ink and stuck in place.  The word plate and Christmas trees are from PaperArtsy and were stamped on stout card in black archival ink and coloured with Copic markers to match the colour theme and cut out with a craft knife.  Some orange Stickles glitter glue was added to the spots on the trees before sticking them in place with Glossy Accents. 


The word plate was edged with ochre ink and mounted on foam pads as shown.  Last job was to add some eyelets with a crop-a-dile to finish both the back and front.

I will decorate the rest of the pages in similar colours in a festive theme so these will be posted as I complete them.  Watch this space.

Sid xx

Pin It

Tuesday, November 23, 2010

Starry Hanger


Here's another one of my Xmas items.  The wood star was kindly provided by Tinkertaylor (Jan) after she asked her hubby to do 50 for her !!!  Now that's true dedication !

I started by selecting a ruler background paper from the Tim Holtz 'Lost and Found' 12 inch paper stash and I glued this to the smooth wooden face of the star with PVA glue.  I then closely trimmed around the star with a craft knife.  I then cut a hole with a crop-a-dile middle of the top point of the star.  The whole star was edged with red chalk ink.


The jingle bells were cut from the reverse of the same paper with a Martha Stewart punch and the three resulting bells were edged with red chalk ink and arranged onto a piece of florists wire threaded through the hole and twisted carefully round a pencil .


I then selected a number 25 from another page of the paper, trimmed it out and matted it onto a piece of slightly larger cream card.  This was edged with ochre chalk ink and after applying a little red Stickles glitter glue around the square was stuck in place as shown.  The noel was from PaperArtsy and was stamped in black archival ink onto another piece of white card, trimmed and again edged in the chalk ink.  This was mounted onto foam pads and applied as shown to add more dimension.

Final embellishment was a piece of folded and trimmed red grosgrain ribbon applied on double sided tape.

Sid xx

Pin It

Sunday, November 21, 2010

Ribbon Wreath


Another of my weekend creations.  This time a ribbon wreath made of .......... yes you guessed it - Ribbons, lots of them !!

I started with a base made of florists wire twisted together to form a circle of about 8 inches in diameter.  I then selected the ribbons from a selection from Andrea the Ribbon Girl in pinks and greens and cut short lengths before tying onto the circle.  I worked around and around until the wire could not be seen.  The ends of the ribbons were cut at an angle to tidy them.


The heart was cut from chipboard using a Sizzix die and was triple heat embossed with opaque pink sparkle embossing powder using a Versamark pad.  A text stamp was used to imprint the design.


A hole was cut with a Crop-a-dile and a length of pink and white bakers twine was attached to the heart and finally to the wire finishing in a hanging loop.

Yet another first for me !!

Sid xx

Pin It

Saturday, November 20, 2010

Shadow Frame Shrine


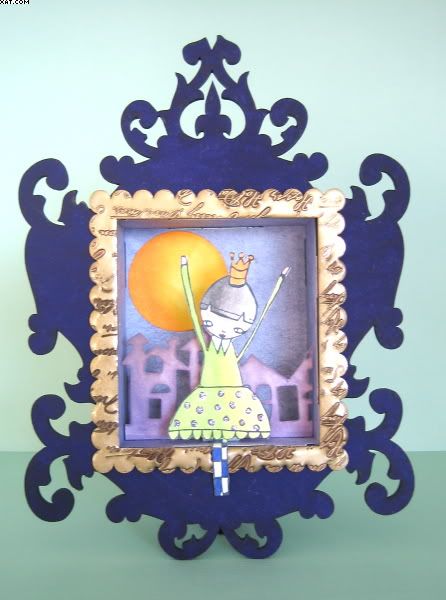
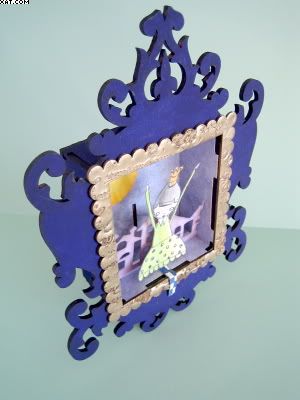
Here is a little shadow frame shrine I made at a recent crafty weekend with a super group of lady crafters. The frame itself was from Dusty Attic and supplied by 3D Jean . Gorgeous ornate front it has too !


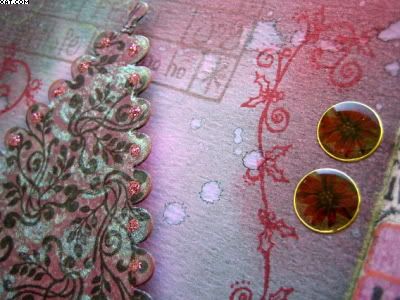
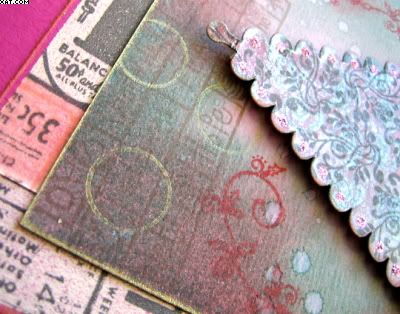
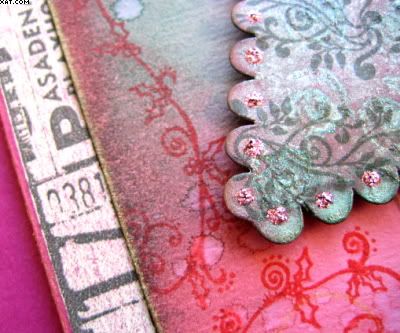
The frame was completely painted with purple Dylusions matt acrylic paint on the outside and the inside lined with printed paper.  The front frame was triple heat embossed (tutorial) with antique gold embossing powder and stamped into with a text stamp which had been inked with Versamark to allow it to be released easily.  This was stuck in place with Glossy Accents.


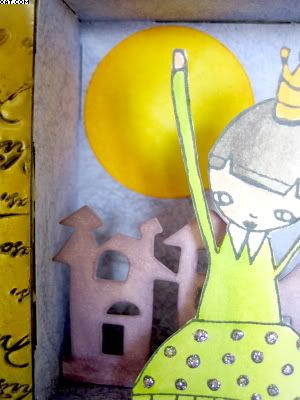
I then used the houses 'on The Edge' TH Sizzix die and cut a strip from white card which was trimmed to fit with a tab at the bottom and coloured with cut'n'dry foam and Distress ink in victorian velvet.  The sun was made from a Nesties die and white card and again coloured with Distress ink in spiced marmalade.

The final element was made from white card stamped with black archival ink with a Unity Stamp - Suzi Blue - Queen of glitter.  She was coloured with Copic markers before trimming out with a craft knife when I removed some of the top and bottom of the image. Some Stickles glitter glue in mauve was added to the spots on her dress.


The elements were then assembled inside the frame at different levels (I added a card tab behind Suzi so she would stand) and bent her legs to fall outside the frame.

This is something I would never have done but I really enjoyed doing it and would love to do more of this type of crafting...........there were seven of these made over the weekend and all were completely different, reflecting each crafters own style.

Sid xx

Pin It

Sunday, November 07, 2010

Festive Fir


Well Christmas is nearly upon us and although I am not fanatical about the festive season I feel obliged (as we do), to do some festive creations.  This one uses a diecut tree as the central piece and I have grunged up the surroundings with Distress inks and traditional colours.

I started with the a maroon card diecut tree and used a Quickie glue pen to draw on some swirls.  Once the swirls had dried clear I sprayed liberally with a home-made mica spray made from silver mica powder a drop or two of gum arabic solution and some pine needles Distress re-inker - I usually spray in a pizza box to avoid the spray going everywhere!  The glue swirls seem to attract the colour but not the mica and provide a nice effect whilst some of the background maroon colour still shows through.  I then inked a small swirl stamp (Crafty Individuals) with Versafine onyx black ink and stamped randomly over the mica background.  I then applied dots of pink Stickles around the edges of the tree and put it aside whilst I made the background.   


I took a piece of heavy pink card and trimmed to size and applied pine needles and barn door Distress ink with cut'n'dry foam keeping the top half of the card more green and the bottom more red.  I stamped an Xmas plate in vintage sepia Versafine a couple of times as seen, a baubles border stamp in onyx black and a Christmas swirl in barn door Distress ink as shown.  All these stamps are from PaperArtsy


I spattered water drops randomly onto the plate and dried with the heat gun before adding pink & aqua Stickles to the spots in the baubles. A circle outline stamp (Artistic Stamper) was inked in galaxy gold Brilliance and applied a few times as seen whilst 2 acrylic poinsettia circles were stuck in place top right. The whole plate was edged with galaxy gold applied direct. The tree was then applied on foam squares as shown.


Another fuschia card plate was cut 1/2 inch bigger all round and this was edged in TH Tissue Tape leaving a 1/16 inch border at the outside edge.


That's it, my first Xmas offering for 2010 !

Sid xx

Pin It
Related Posts Plugin for WordPress, Blogger...