>

Tuesday, July 31, 2007

Stampbord Egyptian Book

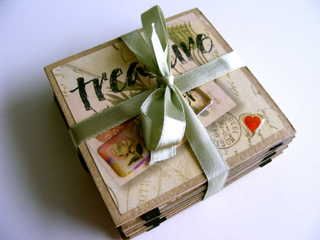
This little book was done as a Stambord Challenge with TalkCrafts Forum members. The challenge was to produce something using Stambord. I decided to use two pieces of 2 inch square Stambord as my base and went for an Egyptian theme.


I first coloured the front and back Stampbord pieces with Whispers dye inks applied and blended with a piece of Cut 'n' Dry foam in Sunshine, Barn Brown & Mossy Stone. I set these with a heat gun before applying an Egyptian hieroglyph cube stamp from Judikins (Artifacts Cube), in black Stazon which I set again with a heat gun. I then edged the pieces with gold Krylon pen.

I cut a concertina insert for the book out of cream laid Conqueror paper with four panels. I then stamped a crackle background in Mossy Stone using a Crafty Individuals rubber stamp.

I then stamped out a selection of images on cream & brown card from the Nonsequitur Egyption stamp plate using Versamark and I heat embossed these with a selection of EP's to compliment the colourway of the book. I cut these out and applied to the panels within, also stamping choice words in black Stazon directly on the panel papers.

Once complete I tied the book closed with a piece of gold braid. To finish I made a pouch out of black velour and adhered a cartouche panel onto the front.


Pin It

Monday, July 30, 2007

Sunset Canvas


This 5 x 7 inch canvas was simply painted using Lyra Aquacolours and a brush. The fleur-de-lys were punched out of coloured papers to highlight the areas of the canvas in corresponding colours and randomly stuck in place. The edge of the canvas was gilded with Krylon and an appropriate quote added on foam pads.

Pin It

Sunday, July 29, 2007

Flower Fairy Shrine


For a while now I have been fascinated by transparent art and the way in which transparencies can be incorporated into art projects using many different multi-media materials.

This is an attempt to do just that. This little shrine was made using a tag cut out from mauve card using the Cricut machine equipped with the 'tags, bags, boxes & more' cartridge. It is a 5 inch tag.

The tag was base coloured using diluted Stewart Gill Alchemy (interference colours with mica) and a natural sponge. Colours used were Pacific & Aurora. These were heat set with a heat gun before rubbing over the surface with Versamark ink and applying Stewart Gill Interference blue embossing powder and heat embossing. The finish is almost hammered with a very reflective quality when moved about in the light.
An ink-jet transparency was printed from the Joanna Sheen 'Flower Fairies' CD and applied between the shrine layers, shiny surface outwards, with double sided tape. The shrine was finally embellished with green and purple mirror backed cabochons adhered with Glossy Accents. Once again the photo does not do the reflective surface justice !

Pin It

Saturday, July 28, 2007

Jacobs Ladder


Here are a few shots of a Jacobs Ladder book I made for yet another swap. I used 3 1/4 inch square pieces of mountboard as the base and covered them with K & Co printed papers cut to 3 inches square. The edges of the mountboard were swiped with a Distress inkpad in tattered straw before covering with the paper squares. The Jacobs Ladder was then assembled before final decoration.

I then cut 6 x 2 inch squares of light card in each of light tan and grey which I stamped with Tanda Stamps flourishes (Set 1) stamps using versamark ink and heat embossed each image using different EP's. I edged each square with black stazon before adhering to the squares once the Jacobs Ladder was assembled. The front and the back of the book was decorated with stamps and black stazon and also epoxy stickers before finishing with a piece of moss green satin ribbon tied in a bow on the front. The inspiration came from Craft TV Weekly

Without Ribbon


Top Down View


Another Top Down View
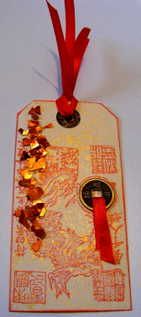


Front Facing Panels


Back Facing Panels


I have not embellished this with photos but it makes a super little album to give as a gift to relatives or friends especially when the pics are those of loved ones.

Pin It

Thursday, July 26, 2007

'Artistic License' ATC's

Another set of 3 ATC's on the theme of 'Artistic License' done for a swap on UK Stampers Forum .

No 1
N0 2

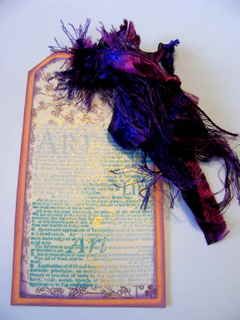
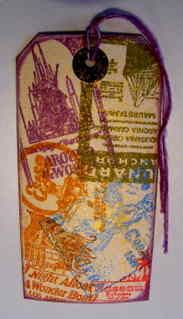
No 3

All have been done using a collage technique and small pieces of mulberry and other handmade papers. Thes have then been stamped, heat embossed with clear EP and either painted or embellished with brads, glitter and a heart image.

Pin It

Sunday, July 22, 2007

Cute Card


I am not really into 'cute' at all, but Kym from UK Stampers challenged us to do something outside of our normal comfort zones. I don't actually possess any cute stamps so she kindly stamped me an image with black stazon which I have subsequently hand coloured with Lyra Aquacolours and brush and finished with 3D Gloss Finish. I have double matted the card and stamped 'Thank You' after stamping the background in Wisteria Ink using a flower spray stamp.

Quite enjoyed doing it actually !!!

Pin It

Saturday, July 21, 2007

'Chinoiserie' Tag


On the theme of 'Asia' and the Orient, this tag was inspired by the reds and golds of typical Chinese art.

The main image was stamped in Brilliance Pearlescent Poppy onto a plain manilla tag using a wood mounted Dragon Collage stamp from Rubber Stampede. The tag was sprayed with Sticky Fingers Gold Shake-n-Spray and dried quickly with a heat gun. A small metal replica chinese coin was decorated with a small piece of red satin ribbon and stuck in place using Glossy accents, whilst a long bead of glossy accents was applied to the left side of the stamp and decorated with Stewart Gill 'Opulence' Byzantia Gilding Chips. When dry the tag was edged with the same Pearlescent Poppy Brilliance ink pad. The hole in the tag was tied with two pieces of red satin ribbon with edges cut at an angle.

Pin It

Arty Farty Tag


I am having a game of 'Tag' at the moment, seems that once on a theme I can't get off it. Promise no more after the next one!!!

This one was again stamped onto a plain Manilla Tag using Colorbox Chalk Ink in French Blue & Aquamarine. The wood mounted stamp was Art, Life & Beauty by Hero Arts. This was then masked and the remainder of the tag was stamped with Wisteria Chalk Ink and an unidentified flower posy stamp. The tag was edged with Wisteria Ink. This was then sprayed with Sticky Fingers Gold Shake-n-Spray which was dried with a heat tool. The tag was then matted onto Dark Peach card and trimmed to leave a 4mm border the edge of which was cut to shape with scissors and also edged with Wisteria Chalk Ink.

The hole in the tag was cut through the mat using the Crop-a-Dile and purple/dark pink fibres added through the tag top to compliment the colourway.

Pin It

'Travel' Tag


This is another tag I have done, I have used my recently aquired Tanda adverts (Plate 3) to stamp randomly on a standard cream tag with various Color Box Chalk Ink pad colours (Olive Pastel, Wisteria, Amber Clay, Yellow Cadmium) & Brilliance (Pearlescent Sky Blue, Pearlescent Poppy). Once stamped I have over-sprayed the tag with Sticky Fingers gold 'Shake-n-Spray'. This has given the whole thing a golden shimmer which is only just picked up in the pic, but looks good when viewed at differing angles.

I edged the tag with the Wisteria Chalk Ink and applied the same pad to the string which I then replaced in the tag top.

Pin It

Wednesday, July 18, 2007

Forget-me-not Tag

Here is a tag I made recently using a base of plain orange cardstock. I randomly stamped a Forget-me-nots stamp (Mary Hughes design) over the surface of the tag with peacock pigment ink and heat embossed this with Stamp-n Stuff Stardust Embossing Powder by Stampendous. Then filled in the odd gap with a Rose stamp (Mary Hughes design) and Versamark which I heat embossed with Detail Gold EP from Stampendous. I then used my beloved US Artquest Jewelz watercolours in interference green & blue to infill the leaves and flowers using a brush and water. The paint is transparent so runs off the embossed image just adhering to the base card.


Once again the Interference is difficult to see in the pic but along with the holographic EP and the gold it looks very rich. I finished off the tag with a piece of black woven ribbon just looped through the hole at the top. I can't resist sparkly and shiny things..........should have been a Magpie!


Pin It

Sunday, July 15, 2007

ATC Kits - 2 more

Here are another 2 ATC's of 10 in the set. This is made from Lulabelle's Kit


and this from Culpepper's Kit

Pin It

Sunday, July 08, 2007

Buttons & Bows ATC Set


Here are three more ATC's for another swap at UK Stampers Forum . These were done on a colour theme using stazon inkpads and US Artquest Stargazer paints to add a shimmer. Masking was used to apply the background floral design. The pic does not do the shimmer justice actually.


Pin It
Related Posts Plugin for WordPress, Blogger...